Integrating a built-in refrigerator into your kitchen enhances its aesthetic appeal and offers an efficient and space-saving solution for keeping your food fresh and organized.
However, to fully enjoy the benefits of your built-in fridge, it’s essential to know how to install and maintain it properly.
This guide will walk you through the essential steps of installing a built-in refrigerator and provide expert tips on keeping it in top-notch condition.
From installation to cleaning, maintenance, and troubleshooting, you’ll find all the information you need to ensure your built-in refrigerator remains a reliable and indispensable appliance in your kitchen.
Let’s begin the journey to a perfectly cooled and organized kitchen.
Key Takeaways
- Accurately measure the space and consider any obstacles or clearance requirements to ensure the new refrigerator fits properly.
- Choose a location away from direct sunlight and heat sources to maintain optimal performance.
- Ensure proper ventilation by providing sufficient clearance around the refrigerator and regularly cleaning the condenser coils and ventilation grilles.
- Level and secure the refrigerator to prevent any imbalance or instability, and develop good maintenance habits like cleaning condenser coils and checking door seals.
What does a built-in refrigerator mean?
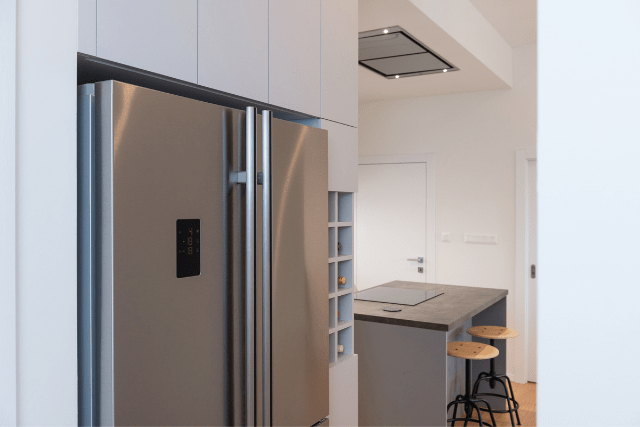
A built-in refrigerator is designed to be installed directly into a cabinet or wall, giving it a seamless and integrated look with the surrounding cabinetry.
Unlike freestanding refrigerators, which can be moved around and placed anywhere in a kitchen, built-in refrigerators are typically custom-fitted to a specific space and cannot be easily relocated.
Built-in refrigerators are often more expensive than freestanding models but offer several advantages. They can be designed to match the style and finish of the surrounding cabinetry, creating a cohesive and streamlined look in the kitchen.
They also tend to be larger and more spacious than freestanding models, with more advanced features such as multiple temperature zones, humidity controls, and advanced air filtration systems.
Advantages of Built-in Refrigerators
Built-in refrigerators offer several advantages in modern kitchens, including:
Seamless Design: One of the biggest advantages of built-in refrigerators is their seamless design. Unlike freestanding models, which can be an eyesore in an otherwise beautiful kitchen, built-in refrigerators are designed to blend in with the surrounding cabinetry. This creates a cohesive, streamlined look that’s perfect for modern kitchens.
Customization: Another advantage of built-in refrigerators is the ability to customize them to your needs. You can choose the size, style, and finish that best fits your kitchen design. This level of customization is not possible with freestanding models.
Advanced Features: Built-in refrigerators often have advanced features unavailable in freestanding models. For example, many built-in refrigerators have multiple temperature zones, humidity controls, and advanced air filtration systems. These features help keep your food fresher for longer and ensure that your refrigerator operates at peak efficiency.
Energy Efficiency: Built-in refrigerators are often more energy-efficient than freestanding models. This is because they are designed to fit snugly into a cabinet or wall, which helps to insulate them and reduce energy consumption. This can lead to significant cost savings over time.
Choosing the Right Location for a Built-in Refrigerator
Choose a suitable location for your built-in refrigerator that meets the proper installation and functionality requirements.
The first thing you need to consider is the size of the refrigerator and the space available in your kitchen. Ensure enough clearance around the refrigerator for proper ventilation and easy door access.
Avoid placing it near heat sources like ovens or dishwashers, as this can affect its performance and energy efficiency. It’s also important to ensure that the floor is level and can support the weight of the refrigerator.
Consider the convenience factor – choose a location that’s easily accessible for everyday use and maintenance.
Measuring the Space
Before installing your refrigerator, it is crucial to measure the available space to ensure a proper fit accurately. This step is essential in the built-in refrigerator installation process and should not be overlooked.
To begin, gather your fridge installation checklist and a measuring tape. Start by measuring the height, width, and depth of the space where you plan to install the refrigerator.
Take precise measurements, accounting for obstacles such as cabinets, countertops, or walls that may affect the fit. Remember to measure the height from the floor to the ceiling and consider any overhead cabinets.
Check the width and depth of the space, considering the door swing and any ventilation requirements. Write down these measurements and keep them handy as you shop for a new refrigerator.
So, take the time to measure your refrigerator space before purchasing a new fridge and enjoy a hassle-free installation experience.
Ensuring Proper Ventilation
Proper ventilation is essential for ensuring your built-in refrigerator’s optimal performance and longevity. Without adequate airflow, your fridge may struggle to maintain the desired temperature, leading to potential food spoilage and increased energy consumption.
To ensure proper ventilation, follow these refrigerator installation tips:
- Positioning: Place your refrigerator at least 2 inches away from the walls to allow air to circulate freely. Avoid placing it near heat sources like ovens or direct sunlight, as it can affect cooling efficiency.
- Clearance: Provide sufficient clearance above the refrigerator to allow hot air to dissipate. Refer to your fridge’s user manual for specific clearance requirements, which may vary depending on the model.
- Clean the Condenser Coils: Regularly clean the condenser coils at the back or bottom of the refrigerator to prevent dust and debris buildup. This buildup can obstruct airflow and strain the refrigerator’s cooling system.
- Check Ventilation Grilles: Ensure that the ventilation grilles on the front or sides of the refrigerator are not blocked by objects or covered with dust. Blocked grilles can impede proper airflow and impact the fridge’s performance.
Levelling the Refrigerator
Positioning your refrigerator correctly is crucial, and another important aspect of ensuring its optimal performance is levelling it properly. When installing a built-in refrigerator, it is essential to ensure it is level to avoid potential problems.
Levelling the refrigerator will help with its overall performance and prevent any unnecessary strain on the compressor and other internal components.
To level your refrigerator, start by placing a level on the top of the unit. Adjust the levelling legs at the refrigerator’s front to achieve a level position. Use a wrench to adjust the legs, ensuring the refrigerator is stable and even.
It is important to note that the refrigerator should be levelled from side to side and front to back. This means checking both the horizontal and vertical levels to ensure proper alignment. Take the time to adjust all four levelling legs to achieve a perfectly levelled refrigerator.
A well-leveled refrigerator will prevent any potential issues and provide optimal cooling performance. It will also ensure that the doors seal properly, preventing air leaks and maintaining an efficient temperature inside the refrigerator.
Connecting the Water Line
When connecting the water line for your built-in refrigerator installation, following these steps is crucial to ensure a proper and leak-free installation. Here are the steps you need to follow:
- Turn off the main water supply: Before you begin, locate the main water supply and shut it off to prevent any water leakage during the installation process.
- Install the water valve: Attach the water valve to the existing water supply line. Make sure to use a T-fitting that matches the size of your water line.
- Connect the water line: Attach one end of the water line to the water valve and the other end to the refrigerator’s water inlet valve. Use a compression fitting to secure the connection.
- Check for leaks: Once the water line is connected, turn on the main water supply and check for any leaks. If you notice any leaks, tighten the connections or replace faulty parts.
- Test the water dispenser and ice maker: After ensuring there are no leaks, test the water dispenser and ice maker to ensure they function properly.
Following these steps will ensure a proper installation and help prevent any future refrigerator troubleshooting or repair needs. Remember to check the water line regularly for any signs of leaks to prevent any potential damage to your refrigerator.
Installing the Door Panels
Following these detailed and precise steps, install the door panels on your refrigerator. Installing the door panels is essential to the built-in refrigerator installation process.
Not only does it give your refrigerator a polished look, but it also helps with refrigerator upkeep, maximizing its lifespan and ensuring efficient fridge usage.
You will need the following tools to install the door panels: a screwdriver, a level, and the door panel kit provided with your refrigerator.
Follow the steps below:
- Start by removing any protective film or packaging from the door panels.
- Align the door panel with the corresponding door and ensure it is level using a level tool.
- Once the door panel is aligned, use a screwdriver to attach the panel to the door. Refer to the instruction manual for the specific screw size and placement.
- Repeat the process for the remaining door panels, ensuring each one is properly aligned and securely attached.

Testing and Adjusting Settings
After securing your refrigerator, the next step is to test and adjust its settings to ensure optimal performance. Properly testing and adjusting the settings of your built-in refrigerator is crucial for maintaining its efficiency and extending its lifespan.
To start, check the refrigerator temperature control.
Set it to the manufacturer’s recommended level, typically between 35 and 38 degrees Fahrenheit (1.7 to 3.3 degrees Celsius) for the refrigerator compartment and 0 degrees Fahrenheit (-18 degrees Celsius) for the freezer compartment.
Use a reliable refrigerator thermometer to verify the accuracy of the temperature. If necessary, make adjustments accordingly using the control panel or dial.
In addition to temperature control, other settings require attention. For instance, check the humidity control if your refrigerator has one.
High humidity levels can lead to condensation and mould growth, while low humidity can cause food to dry out. Adjust the humidity control to the appropriate level based on the type of food you are storing.
Also, pay attention to other settings such as the ice maker, water dispenser, and energy-saving mode. Ensure that the ice maker produces ice properly and that the dispenser dispenses water at the desired temperature.
If your refrigerator has an energy-saving mode, consider activating it to reduce energy consumption.
Cleaning and Maintaining the Refrigerator
Cleaning and maintaining it regularly is crucial to ensure optimal performance and longevity of your refrigerator. Cleaning techniques include wiping down the interior with mild detergent and warm water and cleaning removable parts such as shelves and drawers.
Storing food in airtight containers and regularly discarding expired items is recommended to prevent odours. Organizing the contents of your refrigerator can help improve efficiency and prevent cross-contamination.
Establishing a regular maintenance routine, such as defrosting the freezer and checking the door seals, is essential.
Don’t forget to clean the refrigerator coils at the back or underneath the unit, as they can accumulate dust and affect cooling efficiency.
Cleaning Techniques
Regular cleaning and maintenance of your refrigerator ensures optimal performance and prolongs its lifespan. You should follow these refrigerator cleaning and preventive fridge maintenance tips:
- Clean the interior: Remove all food items from the refrigerator and wipe down all surfaces using a solution of mild detergent and warm water. Pay special attention to spills and stains, and use a toothbrush or soft brush to clean hard-to-reach areas.
- Clean the exterior: Use a damp cloth and mild detergent to clean the exterior surfaces of your refrigerator. Avoid using abrasive cleaners or scrubbing pads that may damage the finish.
- Organize the contents: Regularly check the contents of your refrigerator and discard any expired or spoiled food items. Use clear containers or storage bins to keep similar items together and make it easier to find what you need.
Preventing Odors
One of the most effective ways to prevent odours is to clean the interior of your refrigerator regularly.
Start by removing all the food items and storing them in a cool place while cleaning. Wipe down the shelves, drawers, and refrigerator walls with warm water and mild detergent.
Pay special attention to any spills or stains that may have occurred. Additionally, it is important to regularly check and replace the refrigerator’s air filter, as this can help eliminate any lingering odours.
Keep your refrigerator well-ventilated by allowing air to circulate freely around it. Following these simple steps, you can maintain a fresh-smelling refrigerator and ensure your food stays odor-free.
Organizing Refrigerator Contents
Maintain optimal cleanliness and organization in your refrigerator by implementing effective cleaning and maintenance techniques.
- Regularly clean the interior of your refrigerator using a mixture of mild detergent and warm water. Wipe down shelves, drawers, and door compartments to remove spills or stains.
- Utilize clear storage containers and bins to categorize and separate different types of foods. This will make it easier to find what you need and prevent cross-contamination.
- Arrange items based on expiration dates, placing the ones that need to be used soonest at the front. This will help you avoid wasting food and track what needs to be consumed.
- Use airtight containers or resealable bags to store leftovers and prevent odours from spreading. Placing an open box of baking soda at the back of the refrigerator can help absorb any lingering odours.
Regular Maintenance Routine
Establishing a regular maintenance routine is essential to ensure your refrigerator’s optimal performance and cleanliness. Following these tips, you can keep your refrigerator running smoothly and extend its lifespan.
Knowing what maintenance needs to be done on a refrigerator is important. Regularly clean the interior and exterior of the fridge using a mild detergent and warm water.
Ensure that the condenser coils are dust-free by vacuuming or brushing them gently. Check and replace the water filter as the manufacturer recommends to maintain water quality.
Regarding food storage in refrigerators, ensure that perishable items are stored at the correct temperature and in airtight containers to prevent cross-contamination and maintain freshness. Regularly check for expired or spoiled food and remove them promptly.
Keep the refrigerator door closed as much as possible to save energy. Allow hot foods to cool before placing them in the fridge, and avoid overloading the shelves, as it can hamper proper airflow.
How to Clean Refrigerator Coils?
Cleaning the refrigerator coils is essential in maintaining your refrigerator’s optimal performance and efficiency.
Neglecting this task can lead to reduced cooling capacity, increased energy consumption, and potential breakdowns.
- Gather the necessary materials: You will need a vacuum cleaner with a brush attachment, a coil cleaning brush, and a soft cloth.
- Unplug the refrigerator: Safety first! Always disconnect the power supply before starting any maintenance tasks.
- Locate the coils: Depending on your refrigerator model, the coils can be found either at the back or underneath the unit.
- Vacuum the coils: Use the brush attachment to remove dust and debris from the coils.
- Brush away remaining dirt: Utilize the coil cleaning brush to dislodge stubborn dirt and grease.
- Wipe down the coils: Finish by wiping the coils with a soft cloth to remove any remaining residue.
- Plug the refrigerator back in: Once the coils are clean, plug it back in and enjoy its improved performance.
Troubleshooting Common Issues
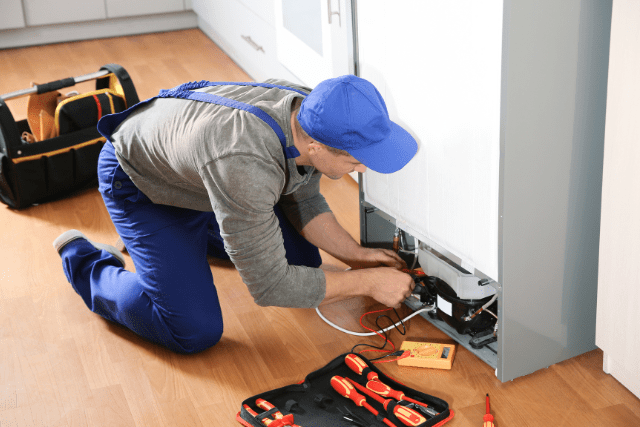
If you notice any issues with your built-in refrigerator, there are several common problems that you can troubleshoot yourself before calling for professional assistance.
One common issue is a refrigerator that isn’t cooling properly. Check to see if the temperature settings are correct and adjust if necessary.
Another problem could be a refrigerator that’s making excessive noise. Ensure the refrigerator is level and no items are touching the unit’s back.
If you notice water leaking inside the refrigerator, it could be due to a clogged drain tube. Try cleaning the tube with a mixture of warm water and mild detergent.
If your refrigerator isn’t running, ensure it’s plugged in properly and the circuit breaker hasn’t tripped.
Tips for Extending the Lifespan
To prolong the lifespan of your built-in refrigerator, continue to address any troubleshooting issues mentioned earlier by performing regular maintenance tasks.
One important maintenance task is to clean the condenser coils at least twice a year. These coils are responsible for releasing heat from the refrigerator, and if they become dirty or clogged, it can cause the refrigerator to work harder and potentially shorten its lifespan.
Another tip is to check the door seals regularly and ensure they’re clean and debris-free. Damaged or loose seals can lead to air leakage, causing the refrigerator to work harder and use more energy.
Avoid overloading the refrigerator with too much food, as it can strain the compressor and other components excessively.
Frequently Asked Questions
How Often Should I Clean the Condenser Coils on My Built-In Refrigerator?
You should clean the condenser coils on your built-in refrigerator at least twice a year.
This helps maintain the efficiency of your refrigerator and prevents dust and debris from obstructing proper airflow.
Can I Install a Built-In Refrigerator in an Outdoor Kitchen?
Yes, you can install a built-in refrigerator in an outdoor kitchen.
However, it’s important to ensure the refrigerator is designed for outdoor use to withstand the elements and temperature fluctuations.
Is It Necessary to Level My Built-In Refrigerator During Installation?
Yes, it’s necessary to level your built-in refrigerator during installation.
This ensures proper functioning and prevents any issues with the door closing properly or the refrigerator not cooling efficiently.
What Is the Recommended Temperature Range for My Built-In Refrigerator?
The recommended temperature range for your built-in refrigerator is typically between 35°F and 38°F (1.7°C and 3.3°C).
Maintaining this range ensures food stays fresh and prevents bacterial growth.
How Can I Prevent Odors From Developing in My Built-In Refrigerator?
To prevent odours from developing in your built-in refrigerator, there are several steps you can take:
- Clean your refrigerator regularly. This includes wiping down the shelves, drawers, and walls with a mild detergent and warm water. Be sure to remove any spills or stains as soon as possible.
- Remove expired food. Check your refrigerator regularly for any expired or spoiled food items. These can give off unpleasant odours and should be discarded promptly.
- Store strong-smelling items in airtight containers. Certain foods, such as onions or cheese, can emit strong odours that can spread to other items in your refrigerator. Storing them in airtight containers can help contain the smell and prevent it from affecting other foods.
In addition to these preventive measures, there are also some odor-absorbing solutions you can try:
- Baking soda: Placing an open box of baking soda in your refrigerator can help absorb odours. Replace the box every 2 to 3 months for maximum effectiveness.
- Activated charcoal: Another option is activated charcoal, known for absorbing odours. You can find activated charcoal in sachets or filters specifically designed for use in refrigerators.
Conclusion
You can ensure your built-in refrigerator’s optimal performance and longevity by following the proper installation steps and essential maintenance tasks.
Choosing the right location and troubleshooting common issues are also key to keeping your refrigerator in shape.
With these tips, you can enjoy the convenience and efficiency of your refrigerator for years to come.

