DIY Home improvement projects (Do-It-Yourself) are an increasingly popular way of giving your house a much-needed makeover. Homeowners are taking on more projects independently rather than hiring a professional.
In this article, we have discussed the top 27 DIY project ideas for home improvement. Also, we have provided various guidelines like steps in planning DIY jobs, required tools, safety precautions, resources, etc.
Benefits of DIY Home Improvement Projects
Do-It-Yourself home improvement projects can provide many benefits, such as cost savings, satisfaction, and a sense of accomplishment. Given below are some of the main benefits of DIY home improvement projects.
Cost Savings
The most obvious benefit of DIY home improvement projects is the potential to save money. Homeowners can save money on labor costs by tackling projects on their own. Additionally, DIY projects can be tailored to fit any budget. Homeowners can buy materials in bulk or find used materials for their projects. This can result in significant cost savings. So, DIY home improvement projects are a great option for those working with a limited budget.
Satisfaction
When a DIY project is completed, the homeowner will experience a sense of satisfaction and pride. After all, they were able to complete the project on their own. This feeling of accomplishment is one of the main benefits of DIY home improvement projects. It is also an excellent productive time-killer for retired people and children on vacation.
Increased Home Value
DIY home improvement projects can increase the value of a home. For instance, painting and landscaping projects can increase a home’s curb appeal and make it more attractive to potential buyers. Additionally, some home improvement projects, such as installing new windows or adding a new room, can increase the size and functionality of a home, which can also lead to an increase in value.
Increased Knowledge
DIY home improvement projects can also help homeowners gain knowledge about home improvement. Homeowners can learn about materials, tools, and techniques by tackling projects independently. This knowledge can help tackle future home improvement projects or help friends and family with their projects.
Improved Home Functionality
DIY home improvement projects can also improve the functionality of a home. Projects such as installing new windows or doors can help improve a home’s energy efficiency and make it more comfortable. Tasks such as installing new light fixtures or ceiling fans can help improve the lighting in a home.
Enhanced Home Aesthetics
DIY home improvement projects can also help enhance the aesthetics of a home. Projects such as painting and landscaping can help make a home look more attractive. Additionally, tasks such as installing new cabinets or countertops can help update the look of a home.
Ability to Personalize Your Home
DIY home improvement projects allow homeowners to personalize their homes. Homeowners can customize their projects to fit their tastes and make their homes more reflective of their personalities. This can help make a home more enjoyable to live in and help make it stand out from other homes.
DIY Home Improvement Projects
There are plenty of options for anyone looking for easy DIY projects to improve their home. Home improvement DIYs can range from simple tasks like painting a room or hanging wall art to more daunting projects such as replacing windows or installing flooring.

No matter the project, these DIYs offer the chance to increase your home’s value while giving it a personalized touch. With online tutorials and easy-to-use products today, almost any project can be done quickly and easily.
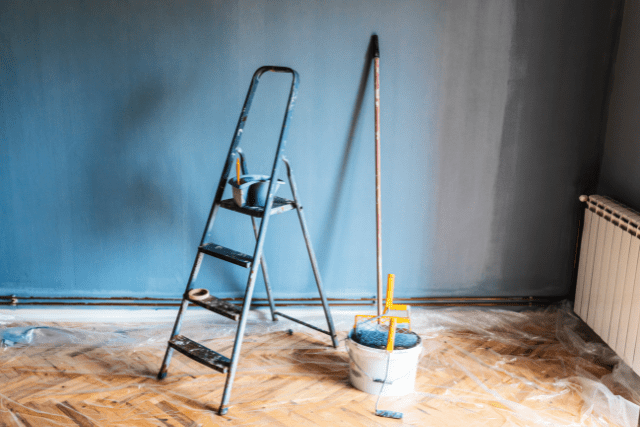
1. Paint a room or accent wall
Painting a room or an accent wall can be a great way to update your space instantly. When considering colour, choose one that will complement the existing decor and furniture in the room. You can opt for a bright, bold hue or patterned wallpaper to make a statement.
On the other hand, if you’re aiming for a more subtle look, opt for a neutral shade like beige or gray. If you plan to colour kitchen walls, here is an ultimate guide.
Once you’ve chosen your colour, the fun begins! Gather your supplies, including a drop cloth, painter’s tape, and brushes or rollers. If you paint a wall with a pattern, use a stencil to create the design.
For a perfect finish, use two coats of paint and let each dry completely before adding another. To protect your work, add a sealant layer once everything is dry. With just a few simple steps, you can transform your space in no time.
2. Hang new curtains or blinds.
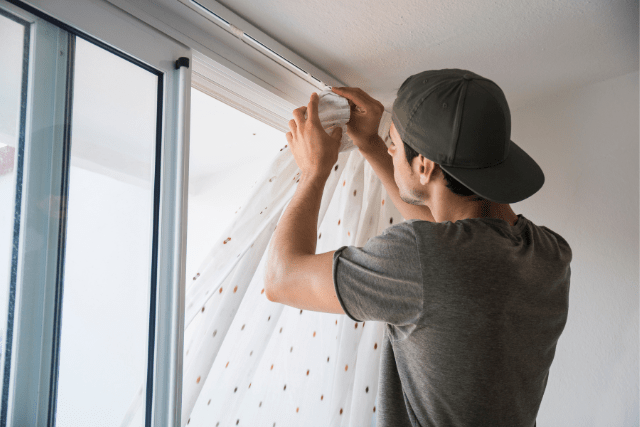
This is one of the most straightforward DIY home improvement projects. Also, adding new curtains or blinds to a room can be an easy and inexpensive way to give the space a fresh and updated look.
You’ll have plenty of options when choosing the right type of curtains or blinds. If you’re looking for something light and airy, sheer curtains are a great choice. Consider heavier curtains or blackout blinds if you’re looking for something more substantial.
There are also plenty of colors and patterns to choose from, so you can easily find something to match your existing décor.
Once you’ve chosen the perfect curtains or blinds, it’s time to hang them up. Measure the window carefully to ensure the curtains or blinds fit correctly.
If you’re unsure how to hang them, plenty of online tutorials are available to help. You can also find tips on how to hang curtains or blinds to enhance the look of your room.
New curtains or blinds can make a huge difference in any room. They can add a touch of style and sophistication or provide more privacy and light control.
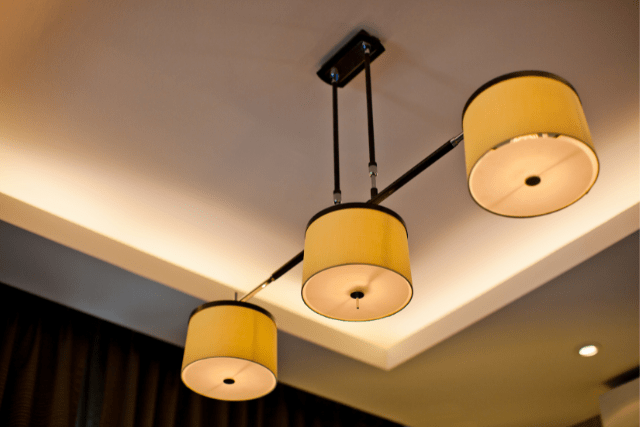
3. Install new light fixtures.
Installing new light fixtures can significantly update your home’s interior design or improve its overall lighting. It can also be a way to save money on your electricity bill.
It’s essential to plan before starting this project to know what kind of light fixtures you need and have the necessary tools and materials.
When choosing the perfect light fixtures, consider the style and size of the room and the overall look you want to achieve. To ensure the light fixtures fit, measure the space and where they’ll go.
You also need to choose the type of lighting you want, such as recessed lighting, track lighting, or flush-mount fixtures.
Once you have the light fixtures, you’ll need to ensure that the electrical wiring is in good working order. You may need to hire a professional electrician if you’re uncomfortable working with electricity.
Depending on the type of light fixtures you’re installing, you may need to make some holes in the wall or ceiling to accommodate the fixtures.
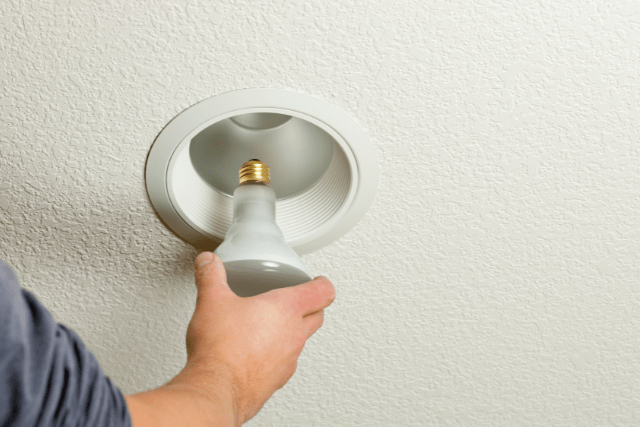
When installing the light fixtures, follow the manufacturer’s instructions. Turning off the power to the area before you begin the installation is essential to avoid any potential electrical shocks. You should also wear protective eyewear and gloves to protect yourself from flying debris.
After the installation, turn the power back on and test the light fixtures to ensure they are working correctly.
With careful planning, the right tools and materials, and patience, you can successfully update your home’s interior design and improve its overall lighting.
4. Paint or refinish existing furniture
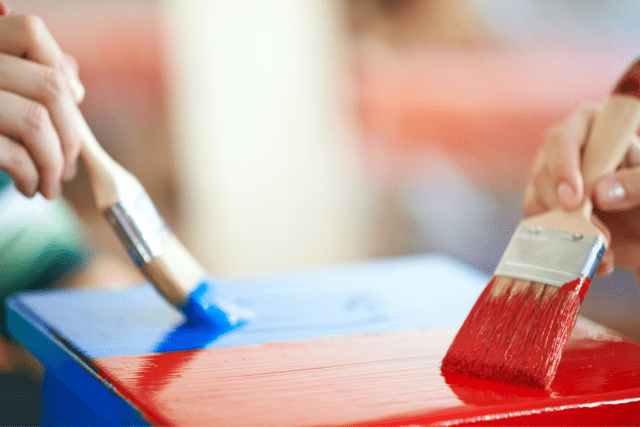
Painting or refinishing existing furniture is a great way to spruce up your home without spending much money. It’s not only a great way to bring new life to a table that may have seen better days but also a great way to add a unique personal touch to your living space.
Refinishing furniture can be a rewarding experience, as you can customize the table to your tastes. Whether you give it a new coat of paint, completely strip it down, or refinish it, you’ll have a piece of truly unique and beautiful furniture.
The first step in refinishing furniture is cleaning the piece to remove dirt and grime. It would be best to use a mild cleaner and a soft cloth to ensure the surface is clean before you start.
Once the furniture is clean, you can decide whether to paint it, strip it down, or refinish it. If you choose to paint the table, make sure to use a high-quality primer and paint. Primer will help the paint stick to the furniture and help it last longer.
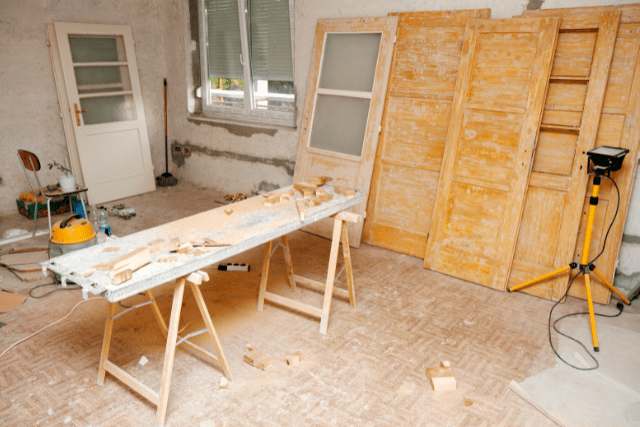
If you strip the furniture, use a chemical stripper and sandpaper to remove the old finish. Once the furniture is stripped, you can apply a new finish.
Painting and refinishing furniture can be labor-intensive, but the results are worth it. You can refinish an old, worn-out piece or completely redesign it. No matter what you choose, you’ll have a bit of unique furniture tailored to your style.
5. Add new hardware to cabinets or furniture.
Adding new hardware to your cabinets or furniture can be a great DIY Home Improvement Project. You can give a fresh, modern feel to your cabinets and furniture with a few simple steps.
The first step is to decide what type of hardware you want to use. You can choose from various options, such as knobs, handles, pulls, etc.
Once you have selected the hardware, you need to measure the space where you will attach it. It will ensure that you get the right hardware size for your cabinets or furniture.
Next, you need to attach the hardware. Depending on the type of hardware you have chosen, you may need to use screws, nails, or other fasteners.
Once you have the hardware attached, select the finish you want. It can range from brushed nickel to oil-rubbed bronze or a distressed look.
Finally, you can add any decorative accents to complete the look. This could include drawer pulls, door knobs, and more.

Adding new hardware to your cabinets or furniture can be a great way to revamp the look of your home. With proper hardware, you can give your furniture and cabinets a fresh, modern feel. The installation process is relatively simple, so you can easily add the hardware to your cabinets or furniture.
6. Build or install shelving units.
Building or installing shelving units can be challenging but worth doing. Following are some essential steps involved in this process.
The first step is to determine the size of the shelving units you plan to build or install.
Once the size is determined, you can gather the necessary materials.
You must purchase lumber, screws, nails, and other hardware to build shelving units from scratch. You must also measure and cut the lumber to the desired size.
After the lumber is cut, you can assemble the shelving units. Depending on the size and design, you may need a power saw or drill to help with the assembly.
Once the shelving units are assembled, you can begin to install them. Use the appropriate anchors and screws to keep the shelves in place.
After the shelves are installed, you can begin organizing and storing items on the shelves.
With patience and proper instructions, building or installing shelves at home or work is easy.
7. Install a backsplash in the kitchen.
Installing a backsplash in your kitchen can add a unique touch and extra personality to the room. While it can seem intimidating, the process is quite simple.
To get started, you’ll need to measure the area you want to cover and purchase the tile of your choice.
When you have everything you need, you can begin laying the tile. Always use a level to ensure that your tiles are even, and lay them out in a pattern you like.
Once the tiles are down, you’ll need to grout them. Ensure to use waterproof grout and use a sealant after to ensure that your backsplash is protected.
Finally, you’ll need to let it dry for a few days before using it.
That’s it. Now, you’ll have a beautiful backsplash that brings your kitchen to life. Here is another article for you on the kitchen backsplash.
8. Replace countertops in the kitchen or bathroom.
Replacing countertops in the kitchen or bathroom is a great way to update the look of your home. It can also be cost-effective if you want to make a significant change without breaking the bank.
There are a few things to consider when deciding if countertop replacement is the right choice for you.
First, you need to decide which material you want to use. Granite, marble, quartz, and laminate are all popular options, each with unique benefits and drawbacks.
After you choose a material, you’ll need to measure the space to ensure that the countertop will fit. Ensure to have the proper height of the kitchen countertop.
You’ll also need to decide if you’d like to install the countertop yourself or if you’d prefer to hire a professional. If you choose to do it yourself, ensure you have all the necessary tools and materials before starting.
Finally, consider the project’s cost and if you need to buy any additional supplies.
9. Install new flooring.
Nothing refreshes the look of a room like a new floor. Whether replacing the existing flooring or putting in a brand new floor, it’s a big job that takes time and effort. But the result can be stunning. If you’re looking to install new flooring, here are some tips to make the process easier.
There are many different options available. You can choose hardwood, laminate, tile, vinyl, and carpet. Each type of flooring has its advantages and disadvantages.
- Hardwood is the best option for adding a classic look to a room, but it can be expensive.
- Laminate is a more affordable option, but it may not last as long as hardwood.
- Tile is a viable solution for bathrooms and kitchens as it is waterproof and easy to clean.
- Vinyl is excellent for those on a budget, as it is relatively inexpensive and easy to install.
- Carpet can be a good way to add warmth to a room, but it can be difficult to clean and maintain.
First, choose the right type of flooring for your space. Consider the room’s function, the amount of foot traffic, and the look you want to achieve.
You’ll also want to consider durability, maintenance, and cost.
Once you’ve decided on the right flooring, it’s time to purchase it. Be sure to buy enough material to cover the entire area and any extra material you might need for cutting and waste.
Next, prepare the room by removing any existing flooring and furniture. When installing hardwood flooring, you’ll need to ensure that the subfloor is even and level.
Once the room is prepped, and the flooring is purchased, it’s time to start the installation process. Depending on the type of flooring you’ve chosen, this could involve laying down a subfloor, gluing, nailing, or floating the flooring.
Finally, once the new floor is installed, it’s time to add the finishing touches. This includes trim, molding, baseboards, and any additional decorative elements. With the proper preparation and care, you can have a beautiful new floor that will last for years.
10. Build a deck or patio.
Building a deck or patio can be an exciting and rewarding endeavor. Building a deck or patio can boost your home’s value and give you a place to relax with friends and family.
Depending on the size and type of deck or patio you want to build, you may need to take several steps to ensure that it’s properly constructed and safe.
The first step in building a deck or patio is to prepare the area. This includes measuring the space and making sure that it is level.
You’ll also need to determine the exact materials you’ll need for the project and ensure that the support structures are strong enough to support the weight of the deck or patio.
When building a deck, you’ll need to decide if you want to use pressure-treated wood or composite material. Pressure-treated lumber is more economical but may require more maintenance over time.
It’s also important to consider the deck’s design and ensure that it will fit in with the style of your home.
Once you’ve determined the materials and design, you’ll need to create a plan for the deck or patio. It should include a detailed sketch of the space, measurements, and materials required.
If you’re hiring a contractor to build the deck or patio, they’ll be able to provide you with a detailed plan. It’s also a good idea to talk to your local building authorities to ensure your project is up to code.
Finally, it’s time to start building your deck or patio. This is the most labor-intensive part of the project, so take your time to ensure everything is done correctly.
Your deck or patio will look great and provide a great place to spend time with friends and family if you maintain it properly.

11. Landscape the yard
Landscaping your yard is a great way to add value to your home and create a beautiful outdoor living space. It can also help you make the most of your land and create a space you and your family can enjoy for years.
Regarding landscaping, there are a few key steps you need to take to ensure you get the best results.
The first step is to figure out what you want from your space. Do you want a low-maintenance yard with minimal upkeep? Or do you want a lush, vibrant garden that you can enjoy year-round?
Once you have an idea of what you want, you can start to plan out the details. It includes choosing the right plants and trees for your area, deciding on a layout, and creating hardscaping features like patios and walkways.
You may also want to consider adding features like lighting, water features, and outdoor furniture to make your space more inviting.
Finally, you’ll need to consider how you’ll maintain your garden. Regular watering and pruning are essential, but you’ll also need to consider weeds, pests, and other issues that could affect the health of your plants.
12. Install a new front door.
Installing a new front door can be daunting, but with patience and the right tools, it can be a relatively simple process.
The first step is to remove the old door. This can be done by unscrewing the hinges and carefully prying them off the frame. Once the old door is removed, the new door can be installed.
Measure the door jamb and cut the new door to the exact size. Make sure to include a gap of about a quarter inch on the sides and bottom.
Once the door is cut to the correct size, it can be hung on the hinges. Secure the hinges to the frame, then attach the door knob and handle.
Finally, add weatherstripping to the door to seal it and keep it weather-tight. With a few simple steps, you can have a new front door in no time.
13. Build a pergola or other outdoor structure.
Building a pergola or other outdoor structure can significantly enhance the look of your garden or outdoor area. Not only can it provide a beautiful, shady seating area for you to relax in, but it can also increase the value of your home.
Whether you’re looking for a way to add some extra charm to your garden or to create a private seating area for you and your family, a pergola or other outdoor structure is an excellent choice.
You’ll need to decide on the size and shape of your pergola. Once you’ve settled on the size and shape, you’ll need to ensure that the design is suitable for your garden.
You should also consider the type of materials you’ll use and the type of wood you’ll use for the frame and the roof.
When it comes to construction, it is crucial to ensure that your pergola is well-built. If you are not confident in your building skills, you may consider hiring a professional to help you out.
While it is possible to build a pergola yourself, it is best to have someone who knows what they are doing to ensure that your structure is safe and secure.
Once your pergola is constructed, you’ll need to consider what type of furniture you’d like to include. Whether it’s a set of chairs and a table or something more elaborate, it’s important to choose pieces that will work with the design of your pergola.
Building a pergola or other outdoor structure is a great way to add charm and character to your garden. Not only will it provide a beautiful, shady seating area for you to relax in, but it can also increase the value of your home.
14. Add new furniture to the home.
Adding new furniture to the home can be a great way to update and refresh the look of your living space. Whether it’s a cozy armchair, a stylish sofa, or even a new dining set, contemporary furniture can add a touch of sophistication and character to any home.
When shopping for new furniture, it’s essential to consider the size of the room, the color scheme, and the overall style you’re trying to achieve.
It’s also a good idea to consider the materials of the furniture and how durable it is. For instance, if you want a couch that will last a long time, look for one made of high-quality materials.
Additionally, take into account the various functions of the furniture. If it’s a couch, consider how comfortable it is; if it’s a dining set, think how many people it can comfortably seat.
Once you’ve settled on the perfect piece of furniture, you can start decorating around it.
Add some throw pillows, a cozy rug, and a few pieces of artwork, and you’ll have an inviting and stylish living space.
15. Create a new storage solution.
Creating storage is a great way to add extra space to your home without buying expensive furniture. This project is also relatively easy to complete, making it an excellent choice for anyone looking to get creative with their home improvement projects.
The first step in this project is to decide what type of storage you want to create. You can choose from cabinets, shelves, or drawers, depending on how much storage space you need and what style you would like to achieve.
Once you have chosen the type of storage you would like to create, you can start building. Depending on your storage type, you may need to cut wood, assemble shelves, or attach drawers.
If you are unfamiliar with the process, plenty of online tutorials can help guide you through it.
Then you can decide how you would like to finish it. You can paint, stain, or leave it as is. If you want to match the décor of your home, you can choose a color or finish that will complement the existing furniture and walls.
You can also add extra features, such as handles or knobs, to help make the storage more functional.
16. Install a home security system.
If you’re looking for a DIY home improvement project to help protect your family and your home, installing a home security system is a great choice. Keeping you, your family and your possessions safe is invaluable, and a home security system can provide peace of mind.
Setting up a home security system can be hard, so it’s important to look into your options and choose the one that works best for you. You may hire a professional for the installation or opt for this DIY home improvement project.
If you choose the DIY route, you’ll need to consider a few things before beginning.
First, you’ll need to decide what type of security system you want. Do you want a basic system that will sound an alarm when a door or window is opened, or do you want a more advanced system that will monitor motion and offer remote access?
Once you’ve determined the type of system you want, you’ll need to purchase the equipment, e.g., cameras, motion detectors, door and window sensors, and control panels.
Once you have the equipment, you’ll need to install it. It may require drilling holes and mounting cameras, running wiring to the control panel, and programming the system. Depending on the system’s complexity, this could take a few hours or days.
17. Upgrade the HVAC system
If you’re looking for a DIY home improvement project that will make a significant impact, upgrading your HVAC system is a great way to go. It increases the efficiency of your home’s heating and cooling and can also save you money on your energy bills.
But before you jump into the project, it’s essential to research and understand the basics of HVAC systems.
Consider the size and type of system you need. There are several different types of HVAC systems, and these depend on the size of your home.
You’ll also need to consider the type of fuel your system will use—either electricity, natural gas, or oil. Purchase the right parts and materials to complete the project.
Next, you’ll need to install the new system. It can be difficult and time-consuming, so getting help from a professional is crucial if you don’t have the knowledge or experience to do it yourself.
It’s essential to keep up with the regular maintenance of your new HVAC system. It includes checking and changing filters and inspecting the system for any leaks or other issues. Regular maintenance will help ensure that your system runs efficiently and effectively, saving you money in the long run.
18. Replace the roof
One of the most rewarding DIY home improvement projects you can take on is replacing your roof. Taking on a project like this can be unsafe, but with the right plan and preparation, you can get it done and protect your home from the elements.

Make sure you know the basic steps involved in replacing the roof. You’ll need to remove the old roofing material, evaluate the underlying structure, and install the new material. Then, you’ll need to ensure that you have the right tools and materials for the job. You’ll need a hammer, nails, shingles, and other supplies.
You may also need to rent a ladder or scaffolding for the higher parts of the roof. Once you have all the necessary supplies, you can start the project.
Start by removing the old roofing material and inspect the structure underneath. Make sure it’s in good condition, and there are no weak spots or potential leaks.
Once the structure is satisfied, you can begin installing the new material. Install the shingles first, and then any other materials you may use to cover the roof.
Use the right nails and fasteners and ensure everything is secure. Once you’ve installed the new material, you can inspect the entire roof to ensure you’ve done an excellent job. After that, you’re done and can sit back and appreciate your hard work!
19. Add or upgrade the siding on the home.
Are you looking for a DIY home improvement project that is sure to add value to your home? Adding or upgrading the siding on your house is a great way to do that!
It’s a relatively easy project that most homeowners can complete with the right tools and materials.
You’ll need to measure and cut the siding to fit each wall, then attach it securely to the house with nails or screws. If you’re working with vinyl siding, you’ll also need to use a special caulk to ensure a waterproof seal around windows and doors.
It’s essential to take your time and ensure you get everything lined up correctly before you start nailing the siding.
Once you’ve finished, your home will look like it has got a makeover! Plus, you’ll be satisfied knowing that you did it all yourself.
20. Add or replace windows in the home.
If you’re looking for a DIY home improvement project, replacing or adding windows to your home is an excellent choice! It’s an easy and relatively inexpensive project that can make a massive difference in the look and feel of your home. Not only will it add more light and ventilation to your home, but it can also increase your home’s value.
Choosing the appropriate window type for your home is essential to ensure it fits your style and practical needs. You’ll also want to consider the size and shape of the window and the type of glazing and insulation you’ll need.
Once you’ve chosen the right window, you can begin the installation process. It usually involves removing the existing window, measuring and cutting the opening, and installing the window frame.
You’ll want to ensure the opening is square and level and that the frame is securely attached to the wall. You’ll also need to check for any signs of water damage before beginning installation, as this can cause more problems later.

Once you’ve installed the window frame, you can fit the window glass, glazing, and insulation.
Finally, you’ll need to check for any gaps around the window frame and seal them with a silicone sealant for extra protection. With time and effort, you can quickly transform your home with a DIY window replacement project!
21. Install a new showerhead
One of the most rewarding DIY home improvement projects you can undertake is installing a new showerhead. Not only will you feel a sense of accomplishment, but you’ll also be able to enjoy the improved shower experience.
The first step to installing a new showerhead is to decide which one you want. There are many options available, from traditional to modern designs, so take the time to find the one that best fits your needs and style.
Once you have chosen the type of showerhead you want, it’s time to purchase it. If you’re shopping online, read the product description carefully to ensure it’s compatible with your water pressure and other requirements.
The next step is to turn off the water supply to the shower. This can be done by turning off the main valve or the valve near the showerhead. Once the water supply is off, you can remove the old showerhead by unscrewing it with a wrench or pliers.
Be careful when unscrewing the old showerhead, as it may be corroded or difficult to remove. Now that the old showerhead is removed, you can install the new one.
Start by attaching the rubber washer to the showerhead, then thread the showerhead onto the water pipe. Tighten it with a wrench or pliers, but be sure not to over-tighten it. After securely tightening the showerhead, you can turn the water supply back on and check for leaks.
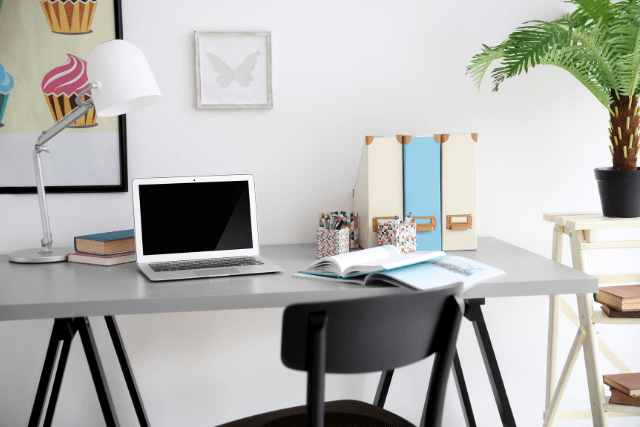
22. Create Your Home Office Space
Are you looking to add a workspace to your home? With some planning, creativity, and DIY home improvement know-how, you can create the perfect office space for you and your family. Here are some tips and tricks to help you create a home office space that is both functional and stylish.
Consider Your Needs
Before starting any DIY home improvement project, you must consider your needs. Ask these questions to yourself.
- What type of work will you be doing in this office space?
- Do you have enough room for all the equipment that you need?
Make sure you have enough space for a desk, chair, filing cabinet, shelves, and other office supplies. You should also consider the type of lighting you need and any different electrical needs. Once you have determined your requirement, you can create your home office space.
Design Your Home Office
When designing your home office space, think about the layout of your room and how you want it to look. Consider the colors, textures, and furniture best suit the area. You can also add personal touches like art, plants, or lamps to make the room more inviting and comfortable. Once you have the basic design, you can add the furniture and accessories.
Choose the Right Furniture
When choosing furniture for your home office, think about how you will use the space.
- Do you need a large desk for plenty of workspaces or a smaller one for a more intimate workspace?
- Do you need shelves for books and files, or will you be able to store everything in drawers?
Ensure that you choose comfortable chairs, and if you’re on a budget, consider purchasing second-hand furniture that you can spruce up with a bit of paint or fabric.
Add Finishing Touches
Once you have your furniture and layout, it’s time to add the finishing touches. You can add artwork, plants, comfortable rugs, and other decorations to make the space more enjoyable. Additionally, you can use wall decals or paint to add a personal touch to the area.
Remember, the goal of this DIY home improvement project is to create a space that is both functional and inviting, so make sure you add enough touches to make it feel like home.
23. Build a Birdhouse
Building a birdhouse is a great DIY home improvement project for those looking to add a bit of charm and character to their outdoor area. Not only is it a fun and creative endeavor, but it can also provide a unique habitat for our feathered friends. Plus, it’s a great way to get the whole family involved in a project that everyone can enjoy.

To get started, you will need some essential tools and materials. You will need a hammer, saw, drill, screws, nails, sandpaper, exterior paint or stain, and the wood for the actual birdhouse. You may need additional supplies depending on the size and shape of the birdhouse you want to build.
Once you have gathered the necessary materials, it’s time to start building. Begin by cutting the wood to size and shaping it into the desired birdhouse shape. You can be as creative as you like with this step, as there are many different styles of birdhouses available.
Once the shape is cut out, use the drill and screws to put it all together. Make sure to use wood screws that are appropriate for outdoor use.
Next, it’s time to sand and paint. Sand the wood to smooth it out, and then paint or stain it in your chosen color. Be sure to use an exterior grade paint or stain to withstand the elements and protect the wood from water damage and rot.
Now it’s time to accessorize! You can add various items such as perches, nesting boxes, and feeders to the birdhouse to make it more inviting for your feathered friends.
Depending on the type of birds you’re hoping to attract, you may want to add additional items such as a birdbath, birdhouse entrance guards, or a wind chime.
You’ll need to place the birdhouse in a spot that is safe and protected from the elements. Choose an area sheltered from wind and rain and away from predators. You should also ensure the birdhouse is at least five feet off the ground to ensure the birds’ safety.
24. Build a Compost Bin
Are you looking for a fun and rewarding DIY home improvement project that will help your garden grow and provide a great return on investment?
Building a compost bin is a great way to do just that! Composting is a great way to reduce waste, create a nutrient-rich soil amendment, and save money in the long run.
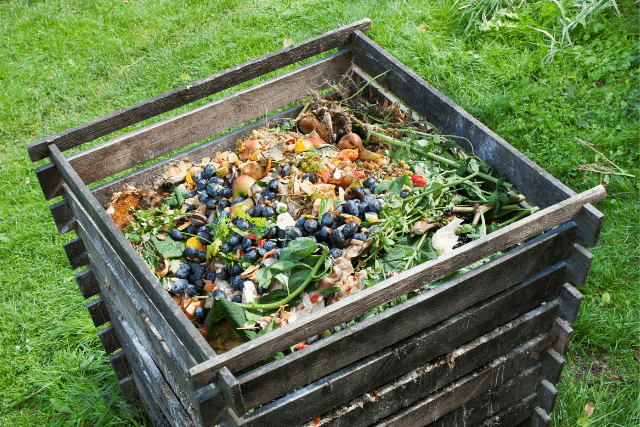
The first step to building a compost bin is deciding what type of bin you want. There are various types of compost bins, from tumblers to open bins.
Once you’ve decided on the type of bin you want to build, it’s time to gather the materials. You’ll need a few essential tools, such as a saw, drill, hammer, and measuring tape.
You’ll also need materials to build your compost bin, such as wood, screws, wire mesh, and hinges. Check your local hardware store for these items, or you can order them online.
Now that you have the materials, it’s time to start building. The steps may vary depending on the type of bin you’ve chosen, but the overall process is the same. Begin by marking out the dimensions of your bin on the wood and cutting it to size.
Once you have all the pieces cut to size, you’ll need to assemble them. Use the screws to attach the pieces and wire mesh and hinges to secure the lid.
That’s it. You’re ready to start composting! Start by adding a layer of soil to the bottom of the bin, then add your kitchen scraps and yard waste. Be sure to turn the compost occasionally to ensure it gets enough air.
25. Install a New Faucet in The Kitchen or Bathroom
Installing a new faucet in your kitchen or bathroom can be a great DIY home improvement project that can spruce up your space. Whether you want to upgrade your fixtures or replace a broken one, this project can be done easily.
You’ll need to gather the necessary tools and supplies for the job. You’ll need a basin wrench, pipe wrench, adjustable wrench, plumber’s tape, Teflon tape, and a chosen faucet. Ensure the faucet you select fits the sink or countertop you’re installing.

The next step is to turn off the water supply to the area where you plan to install the faucet. This is usually done by turning off the shut-off valve beneath the sink.
You must remove the old faucet by unscrewing the mounting nuts and bolts and disconnecting the pipes. Once the old faucet is out of the way, you can install the new one.
Start by applying the plumber’s tape to the threads of the faucet and the pipes, then wrap the Teflon tape around the tube lines. Next, you’ll need to carefully thread the pipes through the sink or countertop and attach them to the faucet.
Once the tap is in place, use the basin and pipe wrench to tighten the mounting nuts and bolts. Double-check to make sure it’s secure.
The last step is to turn the water supply back on and test the faucet to ensure it works properly. If all goes well, you have successfully installed a new faucet in your kitchen or bathroom!
26. Create a Home Bar
Have you been dreaming of having a home bar in your house? If so, now is the perfect time to get started on this DIY home improvement project. A home bar can provide a great gathering spot for entertaining friends and family or relaxing after a long day.
With a few tools and some basic knowledge, you can easily create a stylish and functional home bar that will be the envy of your friends.
Before you start building your home bar, it’s essential to consider the space you have available. If you have a small space, you may opt for a pre-made bar or a fold-down bar that can be easily stored away when unused. However, if you have a larger area, you can create a custom-made bar tailored to your needs.
Regarding the design of your bar, there are many options available. You can choose a classic bar look with wood panelling and a built-in bar top or opt for a more contemporary design with sleek stainless steel accents. If you’re feeling creative, you can create a unique design that blends different elements from different styles.
Once you’ve determined the size and design of your bar, you’ll need to select the materials for your bar. Wood, stainless steel, and glass are the most popular home bar materials. For years, you can use these materials to create a stylish and durable bar.
In addition to the materials, you’ll also need to decide on the accessories for your bar. You’ll need to select a sink, a refrigerator, and any other items you want to include. You may also want to add a few barstools and a table to complete your bar setup.
Now that you’ve chosen the materials and accessories for your bar, it’s time to start building! Building a home bar is relatively straightforward, but taking your time and ensuring you do the job right is essential. Start by building the frame and then adding the shelves and other components.
Once you’ve completed the construction, you can add finishing touches, such as the countertop, sink, and refrigerator.
27. Create a Gallery Wall
Creating a gallery wall is a great DIY home improvement project that can add a unique touch to any room. Whether you’re a beginner or a pro, this project will impress your friends and family. Plus, it’s a fun and creative way to express yourself and display your favourite artwork.
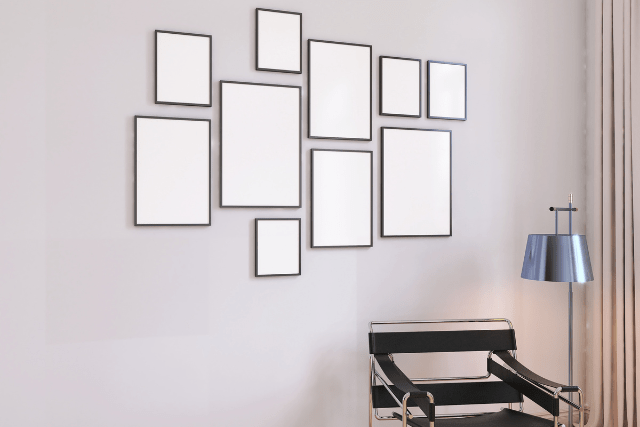
Before you start, it’s crucial to have a plan. Think about what type of artwork you’d like to display, where you’ll hang it, and what colours and textures you’d like to incorporate. This will help you create a visually appealing gallery wall that reflects your style.
Once you’ve selected the pieces you’d like to display, it’s time to pick the materials you’ll need. You’ll need picture frames, mounting hardware, and wall anchors. You’ll also need a level, a measuring tape, and a hammer or screwdriver.
Now it’s time to start hanging your artwork. Begin by marking the wall with a pencil where you’d like to turn each piece. Make sure you measure twice and ensure everything is level before hammering. Once everything is in place, you can begin mounting the artwork. Make sure to use the appropriate mounting hardware for each piece.
Finally, it’s time to enjoy your new gallery wall. You can add additional pieces as you come across them or rearrange the wall as you please. No matter what you decide, your gallery wall will be a unique and eye-catching addition to your home.
How do you find the resources you need to get started?
The good news is that with some research and creativity, you can find the materials, tools, and instructions you need to start your DIY project.
The first place to look is at your local hardware store. Many hardware stores offer classes and tutorials on basic DIY projects, with a wide selection of tools and materials to get you started. Don’t be afraid to ask for help or advice from the staff—they’re there to help you.
You can also check online for tutorials, instructions, materials, and tools. Many websites, forums, and communities offer detailed instructions, step-by-step guides, and project advice.
You can also find materials and tools at second-hand stores, yard sales, and flea markets. Although you won’t have the same selection as a hardware store, you might find some great bargains and unique pieces. Don’t be afraid to get creative with your materials—you can often find ways to use items you already have in new and exciting ways.
Finally, don’t forget to look around your house and the homes of friends and family. You’d be surprised what you can find in people’s closets, attics, and basements. You might find a tool or material you didn’t even know you needed!
Finding resources for DIY projects can be challenging, but it doesn’t have to be. With some research and creativity, you can find the materials, tools, and instructions you need to make your project a success.
Steps for Planning a DIY Home Improvement Project
No matter your DIY project, planning and following simple steps is essential to ensure the project is completed safely and successfully. The following steps will provide you with detailed knowledge for designing DIY home improvement projects.
Assessing the Project
Before beginning any DIY project, it’s essential to assess the project to ensure it can be completed safely and successfully. Identify the type of project. Will you be adding a new feature to your home, such as a deck or a fence, or will you be making repairs, such as replacing a roof or repairing a leaky pipe? Knowing the type of project will help you determine the necessary materials and tools and the project’s complexity.
Evaluate your skills and resources. Do you have the necessary experience and knowledge to complete the project? Are you able to obtain the required tools and materials? If not, can you enlist the help of a friend or professional? Evaluating your skills and resources before beginning a project can help you determine whether it is realistic.
It would help if you created a plan for the project. This plan should include a list of needed materials and tools and a timeline for each project step. If you are working with a professional, discuss the plan with them before beginning the project.

Gather materials and equipment.
Once you have assessed the project and created a plan, it’s time to gather the materials and equipment needed to complete the project. Calculate the materials you will need. It includes everything from lumber to nails to paint. Make sure to factor in any extra materials in case of mistakes or unexpected problems.
You will need to shop for the materials. Read reviews and compare prices before buying something online to get the best deal. If you are shopping in-store, take the time to compare products and ask questions. You may also want to consider renting or borrowing tools and equipment, as this can save you money in the long run.
You will need to gather the necessary tools and equipment. Make sure to check your tools before beginning the project to make sure they are in working order.
Executing the project
Once you have all the necessary materials and tools, it’s time to begin the project. First of all, prepare the area. Clear the area and cover any furniture or floors with a drop cloth.
It’s essential to follow the plan you created. Be sure to read the instructions carefully and take your time. If you make mistakes, it’s better to start over than to try to fix them. Finally, when the project is complete, clean up the area.
Finishing the Project
Once the project is complete, it’s essential to verify the results. If you are working with a professional, discuss any issues or concerns with them before signing off on the project.
It’s time to complete the final touches. It includes adding any decorative elements or finishing touches to the project. It is also an excellent time to take pictures or videos of the project to show off your hard work.
Maintaining the Results
It’s essential to maintain the results of your home improvement projects. It includes regular maintenance, such as cleaning and checking for any issues. It’s also important to be aware of potential problems and take action if necessary.
If you notice any problems or issues, you should contact a professional to assess and repair the problem. Regular maintenance can help ensure your project remains in good condition for years.
Tools and Materials
Whether tackling a major renovation or just sprucing up a few areas, having the right tools and materials is essential. Having the right equipment and supplies can help ensure the success of your DIY project.
Hand Tools
Hand tools are essential for any DIY home improvement project. They are great for small jobs and can be used to cut, shape, and join materials. Whether a novice or a seasoned do-it-yourselfer, you’ll need the proper hand tools to do the job safely and efficiently. Investing in a toolbox or bag is also a good idea to keep all your devices organized and easily accessible.
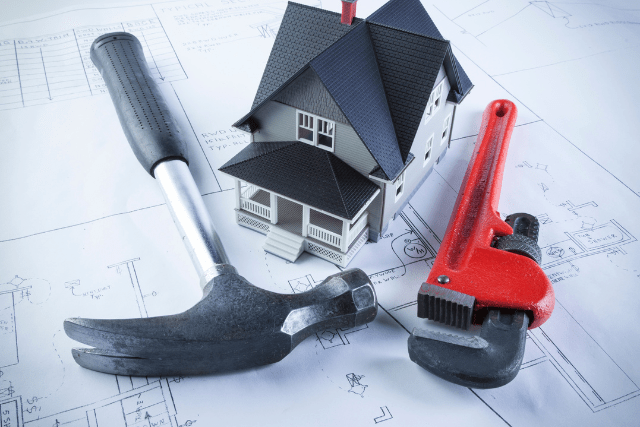
Types of hand tools:
When it comes to hand tools, there are a few main categories, which include cutting tools, measuring tools, and striking tools. Cutting tools include:
- saws,
- chisels, and
- knives.
Measuring tools include:
- rulers,
- tape measures, and
- levels.
Striking tools include:
- hammers,
- screwdrivers, and
- wrenches.
The type of hand tool you need for your project will depend on the specific task you are trying to accomplish.
Basic Toolbox Essentials:
A basic toolbox should include the essential hand tools for a DIY home improvement project. These tools should consist of a hammer, a screwdriver, a set of pliers, a set of wrenches, and a utility knife. Depending on your project, you may also need a saw, a drill, chisels, a level, and a tape measure.
Power Tools
Power tools are a must for larger DIY projects. They can do a much faster and easier job with hand tools that would have taken hours.

Types of power tools
Several power tools can help you with your DIY home improvement projects. These include drills, saws, sanders, and routers. Each of these tools has its specific purpose and can make a big difference in the quality of your project.
Drills are great for creating holes for nails and screws, while saws are ideal for cutting lumber or other materials. Sanders is great for sanding down surfaces and creating a smooth finish, and routers can be used for shaping and cutting intricate designs into wood or other materials.
Benefits of using power tools
Using power tools can have several benefits for DIY home improvement projects. For one, it can help to speed up the process significantly, meaning you can finish projects quicker and move on to the next one.
Power tools can also help to ensure a higher-quality finish, as they are more precise and can provide more control than manual tools. Also, power tools can be safer than manual tools, as they are less likely to cause injury due to their increased power and control.
Tips for Choosing the Right Power Tools
Remember a few things while choosing the power tools for your DIY home improvement project.
You’ll want to ensure the tools you select are the right size and type for the job. For example, drilling into a wall requires a larger drill than drilling into wood.
Also, you should ensure that the power tools you choose are in good shape and have been cared for properly. It will help make sure they are safe to use and last longer.
Safety Considerations
When operating power tools, taking the necessary safety precautions is essential. It includes wearing the proper clothing and protective gear like gloves, goggles, and a face shield.
You’ll want to ensure that the area you’re working in is well-lit and free of any tripping hazards. Please read the instructions for using the power tools very carefully.
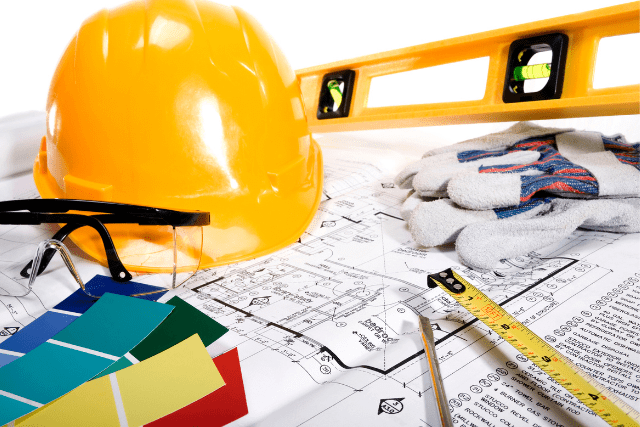
Building Materials
The building materials you will need for your DIY project will depend on your project. Depending on the project’s scope, you might need lumber, drywall, insulation, cement, brick, and stone. Shop around to find the best prices and materials for your project.
When selecting lumber, you must choose between pressure-treated wood and untreated wood. Pressure-treated wood is often more expensive but durable and can withstand the elements better. If budget is an issue, untreated wood might be a better option.
Drywall is another essential material for any DIY home improvement project. Drywall comes in various sizes and thicknesses, so get the right size for your project. For insulation, you must select fibreglass, cellulose, and mineral wool. All three types have advantages and disadvantages, so research to choose the right one for your project.
You must buy the right kind if you’re working with concrete, brick, or stone. Concrete usually comes in bags, while brick and stone can be purchased in various sizes and colours.
Finishing materials such as tapes and adhesives
Finishing materials give your project a professional look. These materials include paint, stain, sealants, caulk, tapes, and adhesives.
The correct type of tape and adhesive can make all the difference in achieving a successful result. Many types of tapes and adhesives are on the market, each for specific tasks.
For quick repairs or general-purpose use, you should look for what is known as pressure-sensitive tape. This type of tape consists of backing material with an adhesive on one side that will stick once pressure is applied. It comes in various sizes and colours, making it great for labelling boxes or taping up posters.
Another popular choice is duct tape, a solid cloth-backed adhesive that works best on smooth surfaces like glass or metal; however, it can leave a residue if removed incorrectly.
Make sure you choose the right type of material for the job and always follow the manufacturer’s instructions for application and use.
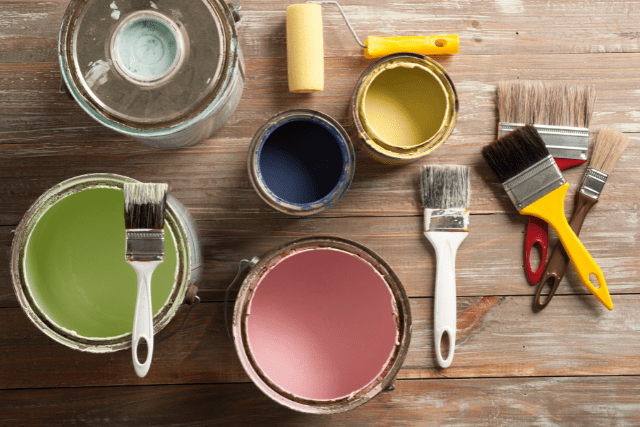
Painting Supplies for DIY Home Décor
Painting is a great way to make your home look more stylish and inviting.
Brushes, rollers, and sprayers:
When it comes to painting, having the right brushes, rollers, and sprayers is essential. Brushes come in a variety of sizes and shapes, so choose the one that best fits the job you are doing. For large surfaces, a roller is usually the best choice. For smaller, more detailed areas, a brush is generally better.
Choosing the correct type of brush or roller is also essential for the paint you are using. For example, natural bristles work best with oil-based paints, and synthetic bristles work best with water-based paints.
Sprayers are also great for larger surfaces but require more skill and experience.
Paint and Primer:
You will also need to choose the right paint for your project. Water-based paints are best for interior walls and ceilings, while oil-based paints are better for exterior surfaces.
Before painting, you should also apply a primer to the surface. Primer helps the paint adhere better and provides extra protection from wear and tear. When shopping for paint and primer, ensure you buy enough to cover the entire surface you are painting.
Sponges and sandpaper:
Before you start painting, it is essential to prepare the surface. Sandpaper is the best way to remove old paint or varnish and help smooth imperfections. After sanding, wipe away any dust or debris with a damp sponge. It will ensure that the new paint adheres properly and looks its best.
Drop Cloths and Plastic Sheeting:
It would be best to use a drop cloth or plastic sheeting to protect your floors and furniture from spills and splatters. Drop cloths come in various sizes and materials, so choose the one that best fits your job. Plastic sheeting is a good choice for larger areas and is easy to cut to the correct size.
Other essential items:
In addition to the items mentioned above, you’ll need some other essential items for your painting project. Painter’s tape is excellent for creating straight edges and neat lines. A ladder or step stool is also essential for reaching high spots. And don’t forget to have some rags and cleaning supplies on hand for any messes.
Painting can be a great way to add a fresh look to your home. With the right tools and materials, you can make your next painting project a success.
And don’t forget to protect your floors and furniture with drop cloths and plastic sheeting. You’ll be ready to tackle your next painting project with these supplies.
Conclusion
There are many potential benefits to completing these DIY home improvement projects. Homeowners can increase their home’s value, improve its energy efficiency, and make it more comfortable and aesthetically pleasing.
Also, you can’t overestimate how good it feels to do a good job. Tackling a project can give you immense pride in your accomplishment and boost your confidence in your abilities.
These improvements don’t have to cost an arm and a leg either; some of the best projects use everyday items in new ways or repurpose old items instead of buying new ones.
If you’re willing to get creative, you can find plenty of inexpensive ways to spruce up your home without breaking the bank. So if you’re looking for ways to improve your living space, consider taking up some DIY projects and making changes today!
Frequently Asked Questions
What are some most common DIY home improvement projects?
Some popular DIY home improvement projects include painting, installing new flooring, updating light fixtures, remodelling bathrooms and kitchens, and building decks or patios.
What tools do I need for basic home improvement?
Basic tools for DIY home improvement projects include a drill, screwdrivers, hammer, level, tape measure, saw, and hand tools. Depending on the project, you may also need specialized tools such as tile cutters or power saws.
How do I know if a DIY home improvement project is too complex?
Suppose you are unsure about your ability to complete a DIY home improvement project. In that case, it’s best to consult with a professional or research online to see if you feel comfortable tackling it. If you are unsure about your electrical or plumbing skills, hiring a professional for those tasks is best.
How do I find instructions and tutorials for DIY home improvement projects?
Many online resources are available for instructions and tutorials for DIY home improvement projects. Websites like YouTube, Home Depot, and Lowe’s offer various tutorials and guides. Also, many home improvement stores offer classes and workshops on various DIY projects.
How much should I budget for a DIY home improvement project?
The cost of a DIY home improvement project can vary greatly depending on the project’s scope and the materials used. Creating a detailed budget and plan is important to ensure you have enough funds to complete the project. Don’t forget to add some extra funds for unexpected costs.
How can my home improvement project meet all building codes and regulations?
Before starting any DIY home improvement project, it’s important to research and ensure that it meets all building codes and regulations in your area. It may be helpful to consult with a professional or visit your local building department to ensure that your project is up to code.
How can I dispose of old materials and debris from my home improvement projects?
Many home improvement stores and waste management companies offer disposal services for old materials and debris from DIY projects. It’s important to properly dispose of any hazardous materials, such as paint or chemicals, following local regulations.
Can I complete these projects while living in a rental property?
It’s important to check with your landlord or property management company before starting any DIY home improvement project in a rental property. Many landlords have specific rules or restrictions about doing modifications to a property.
How can I find the right contractor for a DIY home improvement project?
Researching online reviews and asking for recommendations from friends and family can be a great way to find a reliable contractor for your DIY home improvement project. It’s also essential to check their credentials and insurance before hiring them.
How can I protect my home and property during a DIY home improvement project?
Covering floors and furniture with drop cloths and sealing off rooms or areas to be worked on can help protect your home and property during a DIY home improvement project. Properly storing and disposing of hazardous materials, such as paint or chemicals, is also essential.
How can I ensure safety?
Following the safety precautions and guidelines for the specific project and wearing protective gear such as goggles, gloves, and hard hats can help ensure that your DIY home improvement project is safe. It’s also essential to properly use and maintain any power tools or equipment.
Can I save money by doing a DIY home improvement project?
In some cases, completing a DIY home improvement project can save money compared to hiring a professional. However, it’s essential to factor in the cost of materials, specialized tools, and the time and effort required to complete the project.
How can I ensure that my DIY project adds value to my home?
You can research current home value trends and popular home improvement projects in your area to help ensure that your DIY home improvement project adds value to your home. Additionally, ensuring the project is up to code and meets any relevant regulations can add value to your home.


